Tuesday, May 31, 2011

Spinach and Green Bean Gumbo

I was not going to blog about this one but it was just so good! I threw it together from what I had around using a Green Gumbo technique.

Spinach and Green Bean Gumbo


1 tablespoon lard, butter or Wesson oil
1 onion, chopped
1 green bell pepper, chopped
3 stalks celery, chopped
1 bunch green onions, chopped
3 cloves garlic, minced
4 quarts stock or water
2 bay leaves
Cajun seasoning to taste (start with a tablespoon)
hot sauce to taste (start with 1 teaspoon)
salt and pepper to taste
2 bags (or bunches) spinach
2 cans green beans, drained (or frozen or fresh)
1 15 ounce can whole tomatoes with their juice
cooked rice for serving

Heat the fat or oil over high heat in a large soup pot. Add the onion, bell pepper, celery, green onion and garlic. Cook, stirring occasionally, until beginning to brown.

Add the water or stock, bay leaves, Cajun seasoning, hot sauce, salt and pepper. Bring to a boil. Add the spinach (in batches if necessary to give them a moment to wilt before adding more), beans and tomatoes. Return to a boil. Reduce heat to low and simmer until the spinach is done to your liking.


Re-season if necessary and serve over cooked rice.


Shrimp13

Friday, May 27, 2011

Rhubarb Braised Chicken Thighs

This is a recent Chowhound.com recipe offering. I imagined it being sort of sweet and sour in nature. In fact it was simply savory and delicious. You can learn more about rhubarb at rhubarbinfo.com.

Lately I have been getting very into rhubarb. It is a flavor of my childhood. My Gramma always had some growing by the garage. She used it in bars, as ice cream sauce and in pies. We would eat the raw stalks dipped in cups of sugar.

As usual, this is written as cooked with what I had on hand.

Rhubarb Braised Chicken Thighs


8 chicken thighs with bones and skin
salt
black pepper
2 tablespoons oil
1 onion, chopped
1 teaspoon ground cardamom
1/2 cup red wine
1 cup vegetable stock
2 tablespoons honey
1/4 cup orange juice
1 pound rhubarb, chopped

Rhubarb, chopped

Preheat oven to 375°F. Season chicken generously with salt and pepper.

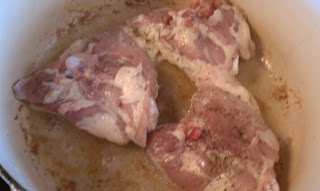
Heat the oil in an ovenproof pot over high heat until shimmering. Put in 1/2 of the chicken, skin side down and brown for 5 minutes.


Flip the chicken and repeat on the other side. Remove chicken to a bowl and repeat with the other half of the chicken.

Reduce heat to medium and remove all but 2 tablespoons of fat. Add the onions, cardamom and salt and pepper to taste.


Saute until the onions soften. Pour in the wine, scraping the bottom of the pot with a wooden spoon to release any browned bits


and reduce the liquid by half. Add the stock, honey, orange juice, chicken pieces (skin side up) and any accumulated juices to the pot.


Put the pot in the oven. Cook until the thighs are cooked through, about 35 minutes. Scatter the rhubarb in the pot and cook for 15 minutes longer.


This chicken was delicious and savory and I wish I was eating some right now!

Shrimp13

Wednesday, May 25, 2011

Chicken Giblet Etouffee

Etouffee is a saucy Cajun dish served over rice. It is like a thicker version of gumbo. Add tomato to etouffee and you have sauce picante. The etouffee method is endlessly debatable and indeed is in Cajun country. It is commonly made with shellfish or chicken. Shrimp, crayfish or chicken pieces can be used with better results if you are not fond of offal.

Chicken Giblet Etouffee


lard, butter or Wesson oil
1 pound or so chicken gizzards, livers and/or hearts (in any combination)
Cajun seasoning
3 tablespoons flour
1 onion, chopped
1 green bell pepper, chopped
3 stalks celery, chopped
1 beer - not hoppy
3 bay leaves

Heat 2 tablespoons lard over medium high heat in a large skillet. Season giblets with Cajun seasoning and brown giblets about 3 minutes a side in batches so as not to crowd them.


Add lard between batches if necessary. When the giblets are nice and brown, remove them to a bowl. Keep the livers separate if using because they will need a much shorter simmering time than heart or gizzards.

Reduce heat to medium, Add lard to the skillet to make a total of three tablespoons. Add the the flour and Cajun seasoning to taste and cook, whisking constantly, until the flour is bubbly and brown.


Add the onion, bell pepper and celery and cook, stirring frequently, until the veggies are softened and the onions are translucent.


Reintroduce the hearts, gizzards and any accumulated juices to the skillet. Add the beer and bay leaves and bring to a boil. Reduce heat to  low, cover and simmer for 1 hour.


Add the livers if using and simmer another few minutes until the liver is cooked through (if it wasn't already).

Serve over rice. I find it delightful but it certainly is for those with a fondness for giblets!

Shrimp13

Tuesday, May 24, 2011

Grilled Corn

Grilled Corn


As long as you have the grill going, you might as well do everything on the grill. Grilling corn is easy. It steams in its own husks.

Soak un-shucked ears in cold water for an hour. Place over hot coals for 25 minutes, turning every 5 minutes. The husks will be somewhat blackened, which looks cool. Then you pull back the husks (the silk comes with it, very handy). Still lookin' cool.

Slather with butter and sprinkle with salt and enjoy!


Shrimp13

Monday, May 23, 2011

Carnitas

I was looking for a recipe for what I think of as carnitas, pork that is slow cooked and then browned in some way. My original version of Authentic Mexican 20th Anniversary Ed: Regional Cooking from the Heart of Mexico by Rick Bayless had a technique for slow-frying, slowly simmering country ribs in lard and then cranking up the heat and frying them to a light golden brown. The meat can then be eaten or cut off the bones and used in tacos (or however you like). We did both.

Carnitas


2 pounds lard
country ribs
salt
strips of zest from 2 key limes
1/4 cup water


Melt the lard over medium heat.


Season the pork with salt and submerge in the lard. Add water. You'll want the pork to be cooking at a low simmer.


Cook this way until the pork is barely tender, about 40 minutes. Crank the heat up to high. The remaining water (if it hasn't all evaporated) will come to a rolling boil.


At some point the water will have boiled off and the bubbles will have gotten smaller and the lard will look clear. Now you're cooking with grease!


Cook this way until lightly golden brown and remove to a draining rig. Immediately sprinkle with salt. At this point you can eat them like pork chops or cut up in tortillas.


Shrimp13

Friday, May 20, 2011

Refried Beans

If you are buying canned refried beans you are cheating yourself. Beans are easy to make. They are nutritious and pinto beans are practically free.

We've experimented with several different dried pulses and even 15 bean soup blend. They all taste different and they all taste great.

Refried Beans
Beans, lower left. Vaca Frita, lower right.

1 pound dried pinto beans
1 onion chopped (optional)
1 tablespoon oil or lard
water
salt
4 rashers smoky bacon, chopped
2 garlic cloves, minced

Sort beans to check for any rocks or little dirt clods. Dirt will make your beans taste like dirt. Place them in a slow cooker. Add water to about 3/4 shy of the rim of the crock. Add oil or lard and onion if using. I prefer it, my wife does not. The beans will be good either way. Set cooker to high.

Beans, right. Pork Shoulder, left.

After 6 hours the beans should be cooked but they can be left to cook for as long as 10 hours. If they are new beans (this year's crop) they will take less time so it's best to check them for doneness periodically. Add salt to taste and let cook for another 1/2 hour or so.

I do not soak my beans. The only advantage I can see to soaking them is a quicker cooking time. You have to plan ahead either way and this way I can start my beans in the morning instead of the night before. I hear that beans can be successfully cooked in salted water but I haven't experimented with that yet. I do know that an acidic environment (like chili) will result in beans that will never cook.

In a large soup pot over medium high heat, cook the bacon, stirring occasionally, until it is browned and has rendered its fat. Add the garlic and cook, stirring constantly until aromatic (almost immediately). Add the beans and some of the cooking liquid. Reserve the rest of the cooking liquid of the beans need thinning as they cook.

Mash the beans with a potato masher as they are coming to temperature. When they are simmering, reduce heat and cook down some if too thin or add cooking liquid if it gets too thick. Taste for seasoning and add salt if necessary.

You can use this refrying method with canned pinto beans. Although it's not as good as homemade, it's way better than canned refried beans. You can also stop short of the refrying process and serve the beans whole in their juices.

Shrimp13

Thursday, May 19, 2011

Squash Ravioli with Sage Butter

The filling of this stuffed pasta is a little sweet from the browned onions, the honey and the squash itself and the sauce is super savory consisting of nothing more than butter and fresh sage. The filling was inspired by this recipe from this book. The pasta dough was all @ruhlman. Home made pasta dough is easy and fun to do

Squash Ravioli


For the pasta;

9 ounces flour
3 eggs

For the filling;

1 cabocha (or whatever winter squash you like) pumpkin, halved and seeded
2 egg yolks
1 tablespoon olive oil
1 onion, finely chopped
1 teaspoon red pepper flakes
1 teaspoon cinnamon
2 tablespoons grated parmigiano-reggiano
2 teaspoons honey
1 cup stock or white wine
salt to taste
grated parmigiano-reggiano for serving

For the sauce;

6 tablespoons butter
18 fresh sage leaves chopped (this is Saveur's ratio but you can use more or less of either)

Pasta.

Mound the flour on the counter or table and make an indentation for the eggs. Crack in the eggs and begin working the flour into the eggs and breaking up the eggs with your fingers. Eventually you will have a cohesive mass to begin kneading by pressing the dough firmly with your palm, folding the dough in half and repeating . Ruhlman's directions are to do this until it has a silky texture, 5 - 10 minutes. I am not sure what is a silky texture. I split the difference and knead for 8 minutes. Press the dough into a disc. Cover it with plastic wrap and let rest for 15 minutes to an hour. The dough can be refrigerated for up to 24 hours.

Filling.

Preaheat oven to 375°F. Bake the squash cut side down on a baking sheet covered in foil until tender. Mine took about 45 minutes but I gave it an hour so it was downright soft. Remove and cool to a handleable temperature. Remove the skin. Add pulp to a bowl and mash. Beat in the egg yolks and set aside.

Heat olive oil in a large skillet over medium heat. Add onions and cook until soft (10 minutes). Add red pepper flakes, cinnamon, cheese, honey, stock and salt and cook for 3 - 4 minutes. Mix in the squash-egg mixture, cook for 2 minutes. Remove from heat and cover to keep warm.

Ravioli.

Cleave pasta disc into 4 quadrants. roll each as thinly as possible.


This is facilitated with a pasta roller but I have used a rolling pin. It works.

Put generous tablespoons of filling a couple of inches apart on one piece of dough.


Moisten the dough around the filling with a finger dipped in water. Place another piece of dough atop this one and press around the filling to seal. Cut into squares.


I used a pizza cutter. I also managed to pour my finger dipping water onto the first batch necessitating some fast action and a bit more flour to render them usable.

Sauce.

Heat butter in a small pan over medium heat. Add sage and cook until golden brown.


Putting it all together.

Boil the ravioli in lots of salted water for about 3 minutes. Drain, plate and drizzle with sage butter and sprinkle with cheese.


Shrimp13

Wednesday, May 18, 2011

Onion Soup

I have been reading the awesome The Apprentice: My Life in the Kitchen by Jacques Pepin. He mentions that one of the soups they used to make at his soup restaurant was onion soup. I recently had a glut of onions and some time so I improvised some. It's super easy and satisfying and cheap to make.

This makes a small batch in a 2 quart soup pot.

Onion Soup


2 tablespoons butter
6 onions, halved and sliced thin
salt
1/2 cup or so red wine
pepper to taste
1 teaspoon herbes de provence (or your favorite dried herbs)
1 bay leaf
1 1/2 quarts water or stock

Heat butter in the bottom of a soup pot over medium heat. Add about 1/3 of the onions and season with salt. Add another 1/3, more salt and repeat with the last 1/3 of the onions.


Cook, stirring infrequently until the onions are well browned. I try to wait as long as possible before the first stirring. A dark fond will develop. Stirring the onions will redistribute the onions' moisture which will deglaze the pan.


When the onions have darkened to your liking, add the wine. Scrape up the bits of fond from the bottom of the pan with a wooden implement (I was going to say spoon but I clearly used a spatula of some kind). Then add the water or stock, pepper, herbes de provence and bay leaf.


Bring to a boil, reduce heat and simmer for and hour or so. Taste and re-season with salt and pepper if necessary.

If you like, you can line bowls with a slice of swiss or provolone cheese before ladling in the soup and top with a crouton of toasted crusty bread. I didn't, I just ate it. Yum!

Shrimp13

Tuesday, May 17, 2011

Dulce de Leche

Translating to milk sweet in Spanish, Dulce de Leche is a caramel sauce made by slow cooking a can of sweetened condensed milk in water until the milk caramelizes. Cooked down further and it becomes caramel candy. Pretty cool, right?

There are 3 common methods;

1) Punch holes in the top of the can to let pressure escape (a teacher told of a time, as a boy, on a camping trip, in charge of heating up the beans, he put the sealed can over the fire until it exploded sending hot beans through the air trailing streamers of steam). Fill a pan with water so it comes 3/4 the way up the side of the can and cook over low heat until the milk is thick and golden and caramelly, 2 - 3 hours.

The traditional "safety" method

2) Don't punch holes in the top (see bean story in previous paragraph). Submerge can in a lot of water and cook slowly for 2 - 3 hours. Again see bean story above.

3) Pour evaporated milk into a large microwave safe bowl and cook for two minutes at a time, whisking until smooth after each 2 minute cooking period, until it reaches the desired consistency (see Cooking For Engineers post here)

On my first try, I lost patience with method 1 when after 3 hours it still looked about as above, white and not caramelly (evidently my heat was too low). I switched to the microwave method and finished it off.

The transformation is amazing. It is caramel; a great dip for apples or a topping for ice cream or use in a pie or cake. I definitely recommend the microwave method.

Shrimp13

Monday, May 16, 2011

Chocolate Pie

My wife researched this recipe for her birthday pie. It is supposed to be a ringer for Marie Calendar's Chocolate Satin Pie. It is very easy to make and tastes pretty convincing.

The crust recipe worked really well and is definitely a keeper. Finn got to have fun pulverizing the graham crackers in a zipper bag with a rubber mallet.

Chocolate Pie

Before addition of whipped cream and chocolate shavings.

For the crust;

1 1/2 cup finely ground graham cracker crumbs
1/3 cup sugar
6 tablespoons butter, melted
1/2 teaspoon cinnamon

For the filling;

1 1/2 cup evaporated milk
2 egg yolks
2 cups semi-sweet chocolate morsels

To finish the pie;

whip cream
dark chocolate shavings

Preheat oven to 375°F. Stir together crust ingredients and press into a pie plate. Bake for 7 minutes. Remove to a cooling rack.


When the crust has cooled, whisk evaporated milk and egg yolks in a medium sauce pan over medium low heat until mixture is steaming but not yet boiling.


Remove from heat and stir in the chocolate morsels until the mixture is very smooth.


Pour into crust and refrigerate for 3 hours.

Just before serving, top with whipped cream and chocolate shavings. (I neglected to get a pic of the finished product before we devoured it!)

Shrimp13

Thursday, May 12, 2011

Chimichurri

I am not a fan of too much parsley. It's a bit too harsh if used in the amount needed say for tabbouleh or couscous salad. I generally use it sparingly fresh and raw. I only use it in any quantity if it's going to be cooked as in a stock or as an herb in a braised dish. Chimichurri is the exception.

Chimichurri is an Argentinian sauce that makes me think of parsley pesto. I used it as a sauce for pizza with a little cheese and it was killer.

Here is a link to the simplyrecipes.com recipe I used for guidance.

Chimichurri


1 cup fresh parsley
4 garlic cloves
1 teaspoon or so Italian herb blend (I use this in place of oregano)
1/2 cup olive oil
2 tablespoons vinegar
salt, pepper and red pepper flakes to taste

Finely chop the parsley and garlic. Place in a bowl. Add dried herbs, oil, vinegar, salt, pepper and pepper flakes.

Below is the spread of various pizzas that pizza night, one of which (behind the jar of Lorne Green's italian dressing) was my chimichurri pizza. Yum! (Note Harold McGee method of holding the pizzas on a rack and cutting with scissors to maintain crust crispness.)


Next I will try it with pasta.

Shrimp13

Wednesday, May 11, 2011

Roast Chicken

I think I finally nailed this thing. I'm to understand that along with the omelet, the roast chicken is a true test of one's cooking skills. Mine invariably comes out with a soggy or overly dry and papery skin. The herbs on the skin's surface burn. The meat is never done exactly to my taste.

That said, I do it again and again, never the same way twice. On Sunday I think I finally achieved a method.

Roast Chicken


1 chicken
olive oil
salt
black pepper
dried thyme leaves
1 handful fresh sage
1 small onion, quartered

Preheat oven to 400°F. Rinse chicken and dry thoroughly with paper towels. Place chicken on the rack of a roasting pan. Rub chicken down thoroughly with oil and season to taste with salt, pepper and thyme. Do not go easy on the salt.

Insert the onion and sage in the cavity of the chicken. Roast for about 18 minutes a pound. My 4 pounder took 1 1/2 hours.

Chicken doneness is somewhat a matter of opinion. It is technically safe to eat when the breast reaches an internal temperature of 155°F. At this point it still has a gelatinous, pinkish quality that isn't appetizing. I shoot for 165° in the breast and 175° in the thigh should the fates decree that ratio is met. It usually isn't and one or the other is a little (technically) overdone. It's hard to overdo a thigh but the breast can be like papier mache or something when overcooked.

When all else fails, if the juices in the cavity run clear (not red) you'll be good to go. Discard the onion and sage before serving.

Let rest for 15 minutes before carving.

The skin was crisp and the bird was nicely seasoned and delicious!

Shrimp13

Tuesday, May 10, 2011

Deviled Eggs

Special occasions call for deviled eggs. It seems that every family has an immutable deviled egg recipe with some flavor component that, if missing, ruins the experience. My brother's nuclear family calls for onions and horseradish in theirs which is odd because horseradish was never part of my mom's recipe. My mom did include the onion though with which my wife cannot abide.

My brother's mother in law offered to make their celebratory eggs once and was shooed out of the kitchen after she asked where the sugar and ketchup were.

2 things that will ruin deviled eggs no matter what your taste are buying them at the store or overcooking the eggs and not cooling them down quickly. Overcooked eggs are sulfurous, green about the yolk and rubbery like a pencil eraser.

Here is how we do it in our nuclear family;

Deviled Eggs


eggs
mayonnaise
prepared mustard
salt
smoked paprika (new tradition!)

Place the eggs in a medium sauce pan and add cold water to cover. Place pan over high heat and bring to a full boil. Remove from heat, cover and leave them be for 15 minutes. Immediately cool under cold running water. I combine this task with watering our crape myrtle because I am that way.

Shell the eggs, cut in half lengthwise. Remove the yolks to a small bowl while staging the halves of whites on a plate.

Mash the yolks with a fork. Stir in mayo, mustard and salt to taste. I start with a tablespoon or so mayo, teaspoon or so mustard and a pinch of salt. When the yolks are creamy and delicious, spoon them back into the whites and sprinkle with a little smoked paprika.

Shrimp13

Monday, May 9, 2011

Caponata

Eggplants were cheap at the store. They're great (and great for a low calorie dish) in a ton of ways; grilled, sauted, as a dip, breaded and fried and in various vegetable stew concoctions. Caponata is the Sicilian version of stewed eggplant.

I have improvised something like this many times but never caught the importance of the vinegar and capers in the dish. I'm glad I did. Atop crusty bread, it was almost impossible not to eat it all. I used this epicurious recipe as my guide.

A lot of eggplant preparations start with salting and draining. I have yet to have the gain outweigh the effort. I never do. As usual, this recipe is as I cooked it.

Caponata

Not exactly sure why I chose this jaunty angle.


3 eggplants, chopped into 1 inch dice
salt
3/4 cups olive oil, divided
1 onion, chopped
4 stalks celery, sliced thinly
2 - 3 tablespoons capers, drained if in brine, rinsed if in salt
1 teaspoon sugar
1 15 ounce can fire roasted tomatoes
1/3 cup vinegar

Heat 1/4 cup olive oil over medium high heat in a large skillet. Cook the onion and celery, stirring occasionally, until browned. Stir in the capers and sugar and cook for a minute or two more. Add the tomatoes and their juice and the vinegar. Cover, reduce heat and simmer for 20 minutes.

Meanwhile salt the eggplant generously. Heat 1/4 cup oil in a large skillet over medium high heat and cook half of the eggplant, turning occasionally, until browned on all sides and cooked through. remove to paper towels to drain. Repeat with second half of eggplant.

Spread the eggplant out in a tray or dish and cover with the onion, celery, tomato, caper, vinegar mixture. Cover with a clean dish towel and leave at room temperature for 8 hours for the flavors to meld. Serve immediately or refrigerate.

This is definitely going to be added to my repertoire of crusty bread toppings and is now my second favorite eggplant preparation (behind Parmesan). Tasty!

Shrimp13